A Fabulous Star-Spangled Flower Arrangement for your Fourth of July Festivities…

I love flowers. I was a floral designer for over a decade, and I think a home should never be without them. They just make you happy. I’ll use any excuse to bring them home…this week’s excuse is the Fourth of July!…
I created this Star-Spangled Arrangement for a mere $16 from grocery store bunches. (this arrangement would cost you about $65 (not including the vase) in a flower shop. I even managed to get a few stems free for a little bonus arrangement, but more on that later. Here’s the how-to for this one:
First, gather your “ingredients”. A vase of appropriate size, clear floral tape and a floral knife (available online or at most hobby shops), floral preservative packets (you’ll grab a few of these when you buy your flowers, they are free with purchase), and of course, your flowers. Here I am using one bunch (3 stems) of blue Hydrangea from Whole Foods, $9.99; a bunch (5 stems) of white Fuji Mums, $3 (on sale!) at Whole Foods, and a bunch (10 stems) of red Gladiolas, $2.99 (on sale!) at King Soopers (Kroger Market)
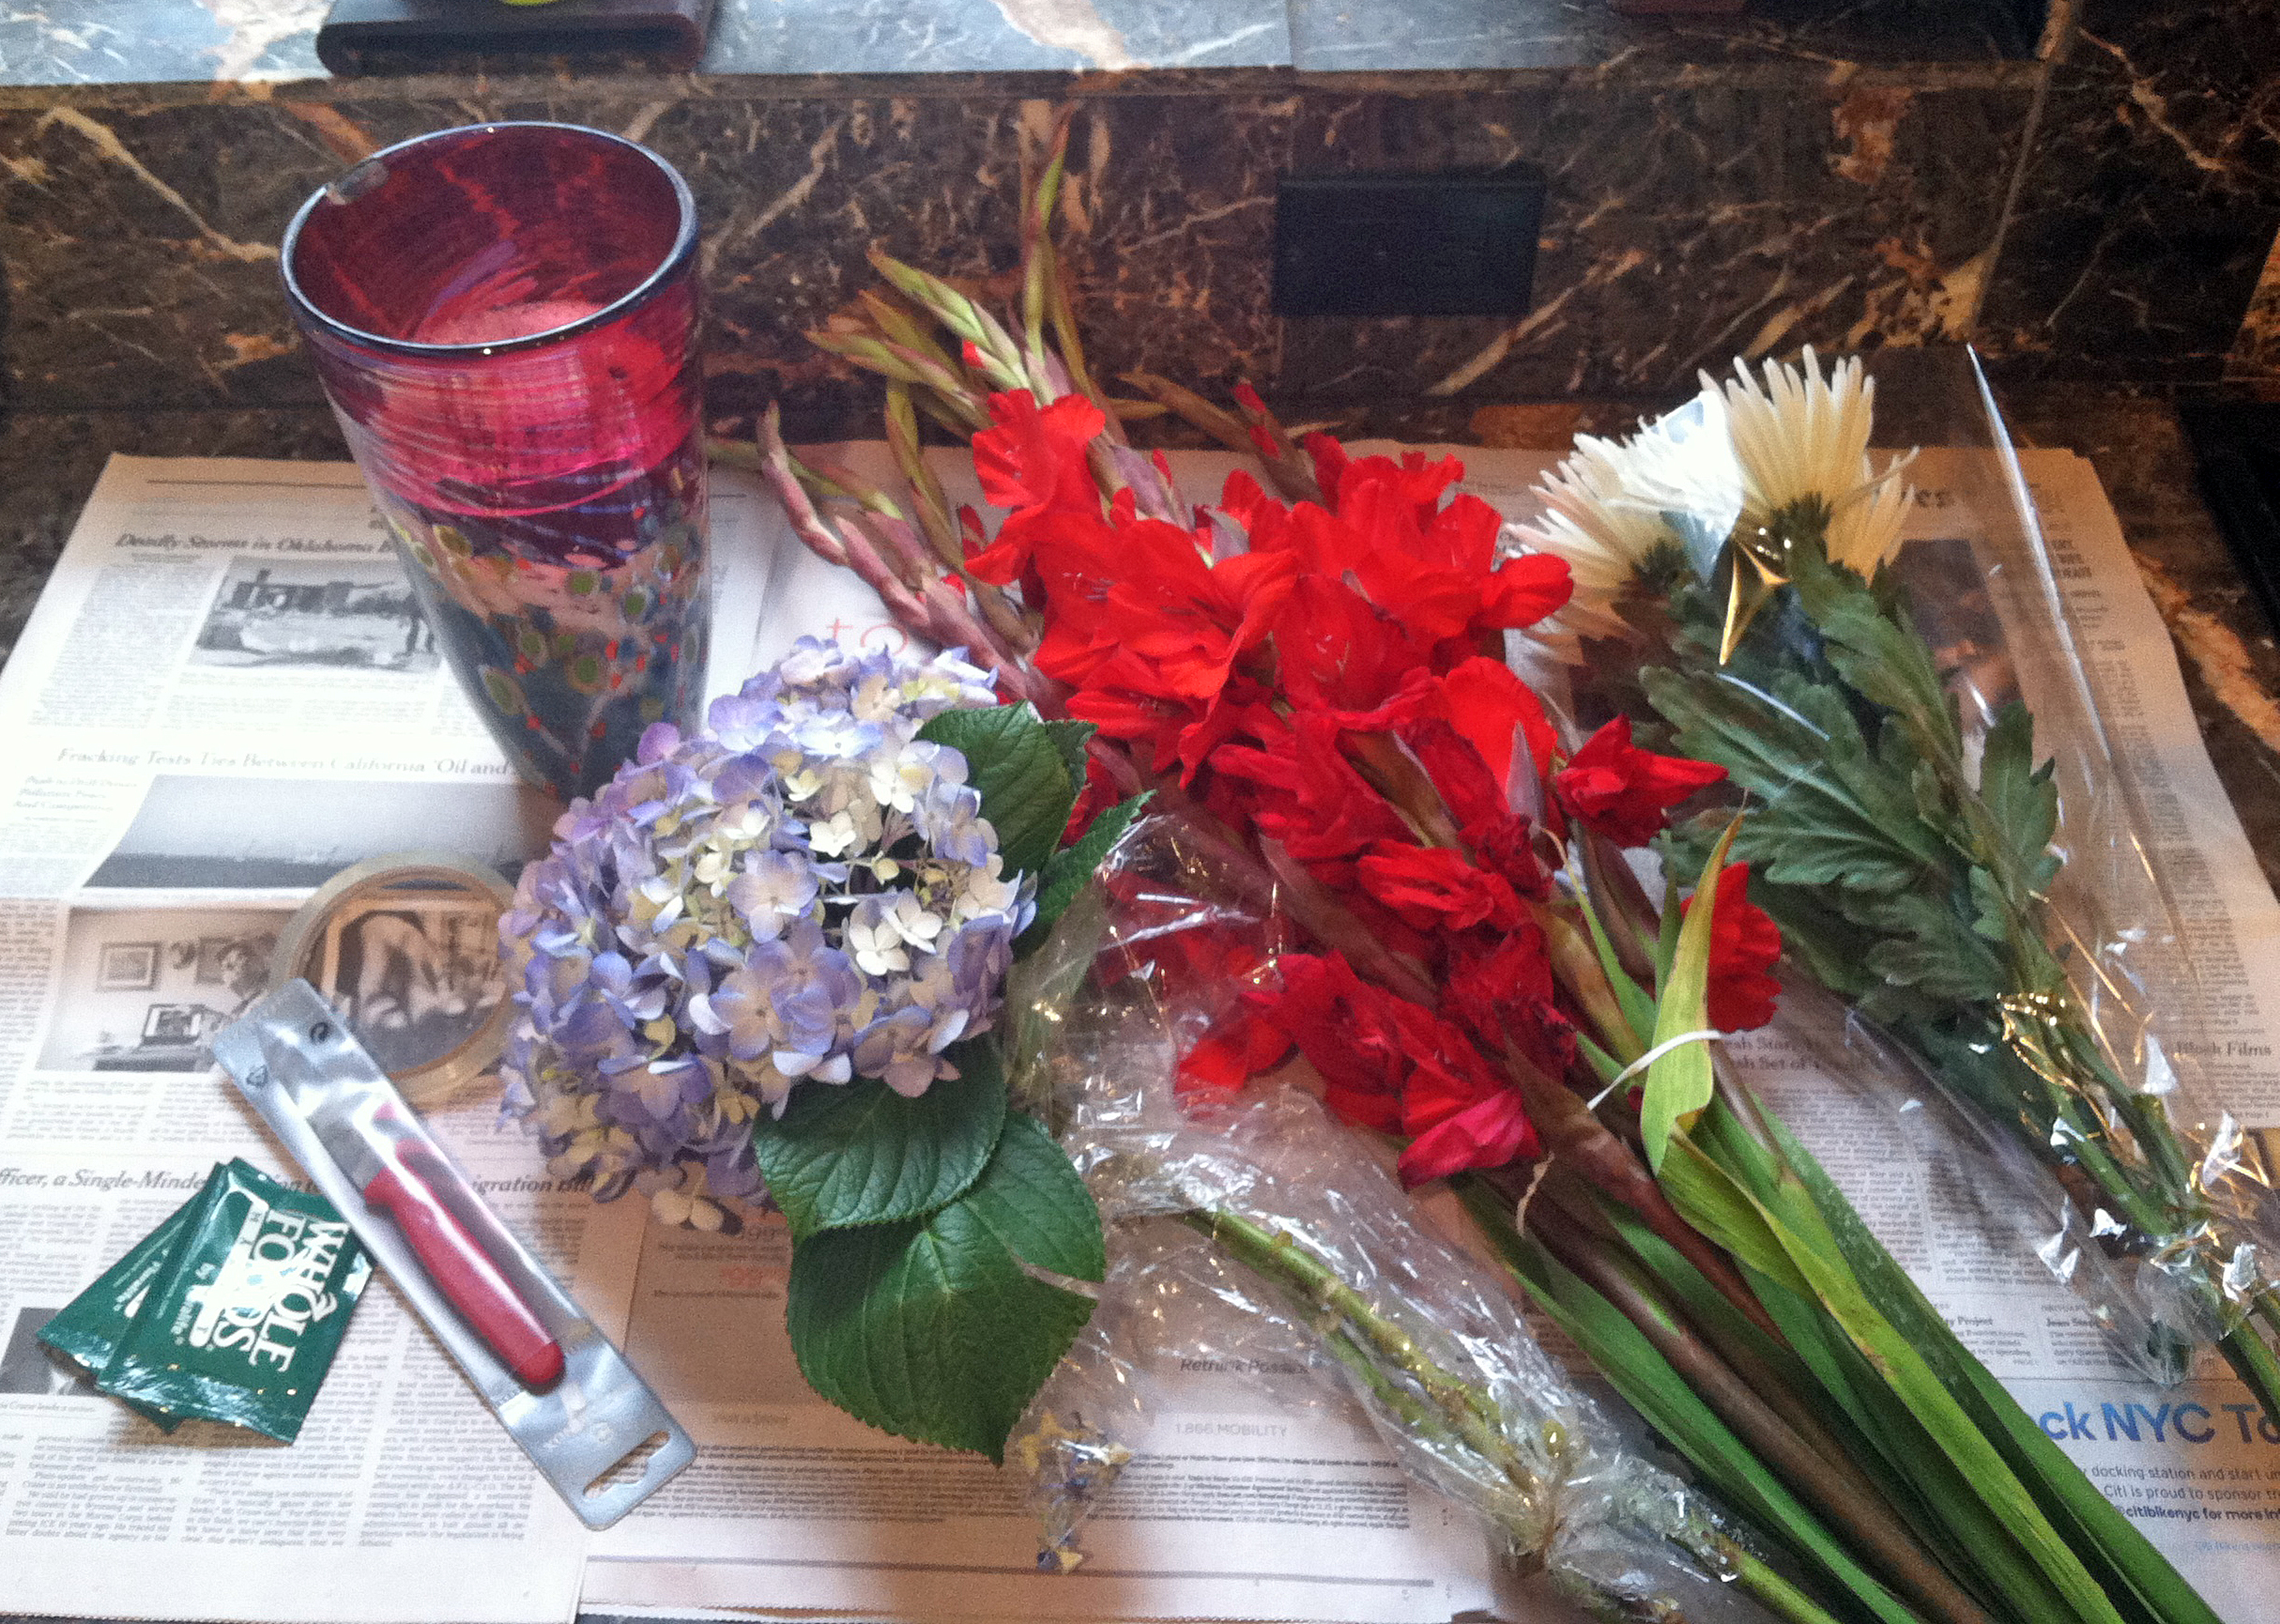
The next step is to fill your vase with water, adding one of the packets of preservative. Then you’ll need to tape your vase. This is crucial to a solid arrangement! It gives the flowers structure and makes arranging them easy. First, tape across the top of the vase about 1″ apart, then cross over the other way (either a diamond or square pattern is ok, both work just fine) Then go around the outside top of the base to hold down your tape grid, making sure your tape goes over the edges of your grid, and tapes over itself at the end. This step is very important, or your grid will come apart when you start adding your flowers.
In this arrangement, I am using the 3 stems of hydrangea as a base, instead of the usual greens. I like this technique, it is a clean, modern look, and just 2-3 hydrangea stems fill the whole base of the vase and form a great structure to work off , as you can place other stems right into the hydrangea (they are great alone as well). They may seem like an expensive choice, but because of their size, they are good bang for the buck. Hydrangea can be a little tricky, as the stems must be cut underwater. If they are not, the stems suck up air and your flower will be a wilted mess in a hurry. Measure (by eye) where to cut your flower by holding it up against your vase. Cut the stems (with a sharp floral knife at a 45 degree angle) underwater, and hold them there for a minute, then place them quickly into your vase.


Now it’s time for the tall stuff, the gladiolas. Start by removing any spent blooms as well as the leaves at the bottom. Again, “measure” the stem by holding it up against the vase to eye-ball where to cut, cut at a 45 degree angle (you don’t have to cut these underwater) and add to your vase. Repeat this, starting with taller at the center and shorter and pointed more outward out from the center. Turn your vase as you work to check for “rounded-ness”. Don’t be afraid to place them right into the hydrangea, just be gentle.


When you are happy with this stage, it’s time for the white fuji mums. Nothing says “fireworks” like a fuji! Remove all or just the lower leaves (depending on your taste, some people think fuji leaves are ugly) from the stems, measure your fujis, cut and place in the vase. Watch the “levels”, you don’t want your flowers all at the same height, stagger the lengths and fill in the “holes” around the vase. And…you’re done!

A fun Red White and Blue arrangement, and everyone will be wow’d you made it yourself.
BONUS!
One of the things I love about Whole Foods is their top-notch customer service. If you are not happy, or they are out of something you need, they will often “sample-out”, or give you free, something equivalent. This happened for me when buying flowers for his post. They had one last bunch of white fuji’s, and it was short one stem (it had 4 instead of 5) their oh-so-nice floral lady gave that bunch gratis, and went to see if there was another bunch in back. There was! So I got my needed 5-stem bunch plus 4 extra stems free. It never hurts to ask! This is what I did with my Free bunch:
I grabbed my little vintage creamer and filled it with water and preservative. Then I clipped a couple fern fronds and jasmine stems from the yard, removed the leaves on the bottom (nothing fouls up the water faster than leaves), and added my 4 stems of fujis. They have a happy home here next to my “chalkboard chicken” in the kitchen.


A Note on making your flowers last: The most important thing you can do to make your flowers last is change the water, daily if possible. This is where your extra preservative packets come in. Add one each time you change the water. Your flowers will thank you! Pull out any dying or dead flowers right away. You’ll notice some flowers last longer than others, and you can re-cut those and create a smaller arrangement from them. I’ll be creating many more Flower How-to posts in the future, so subscribe to the blog using one of the links to the right and you won’t miss a thing!
Have a flower question? Ask me in the “Leave a Reply” sections and I’ll be happy to answer it.

Pingback: I made this, cheap! So can you...Star-Spangled Fourth of July Flower arrangement... - Modern